Prologue
I have always wanted to build with an ARM MCU, STM32 was on top of my to-learn list.
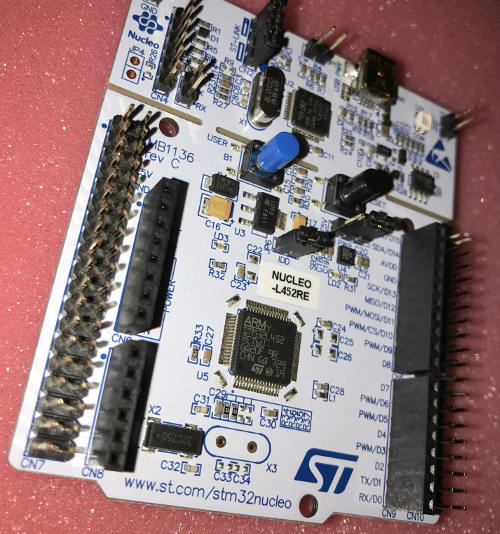
Happily, not so long ago a respected colleague lent me an STM32 Nucleo board to play with, as usual, it stayed in its box for a while and then I started learning about the STM32 MCU and the toolchain and the capabilities of that great MCU.
So in this introductory post, I will discuss how to setup your Linux development environment and your arm-gcc toolchain to start compiling and running code on your STM32 MCU.
Setup ARM-GCC Toolchain: SW4STM32
I will be using the SW4STM32 (System Workbench for STM32), it’s a free development environment based on Eclipse and GCC, it supports mostly all the STM32 boards and microcontroller.
I went with SW4STM32 since it supports STM32 Nucleo boards, which I will be using through my experimentation with STM32 L4-series of ultra-low power microcontrollers, specifically, the NUCLEO-L452RE Rev C with the STM32L452RE MCU onboard.
Register on AC6/OpenSTM32 Website
You would need to register on the OpenSTM32 Community Site, to be able to download the installer and follow instructions — yes, I know, it’s just the way it is for now at least —
Install SW4STM32 Bare Metal Edition
Install System Workbench for STM32 - Bare Metal Edition by following the instructions on the OpenSTM32 website, there are two options, either by using the installer or by installing from Eclipse.
Ping me with any questions/issues regarding installation on Linux and I might be able to help 😄
Download Example Projects: STM32CubeL4
STM32CubeL4 is the MCU Full Package for the STM32L4 Series as STMicroelectronics state on their STM32CubeL4 Github page.
It hosts very valuable examples and saves you some good time diving into SMT32L4 MCUs. Not only that, but it also includes project setups for multiple development environments including SW4STM32, MDK-ARM and EWARM.
I suggest you clone it or download it as a ZIP file into your machine using git,
| |
Let’s start with the simplest of examples, the GPIO_EXTI, EXTI stands for external interrupt line. You can find the example and project setup directories under the following path in the STM32CubeL4 repository:
| |
The GPIO_EXTI example demonstrates setting up an interrupt triggered by the falling edge of the PC.13 pin which is connected to the blue push button labelled USER on the Nucleo board, this interrupt will control LED LD2 that is toggled On and Off as the user hits the USER button.
Method A: Create New C Project
This method is only recommended if you are starting a project from scratch, I would suggest you follow on with Method B below, which is what I did in my experiment.
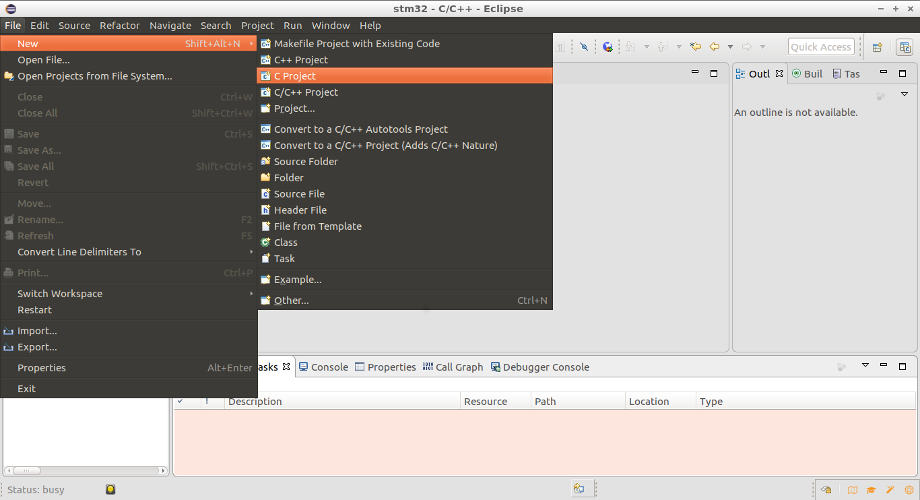
Now, let’s start by creating a new C project from the menu click on File > New > C Project,
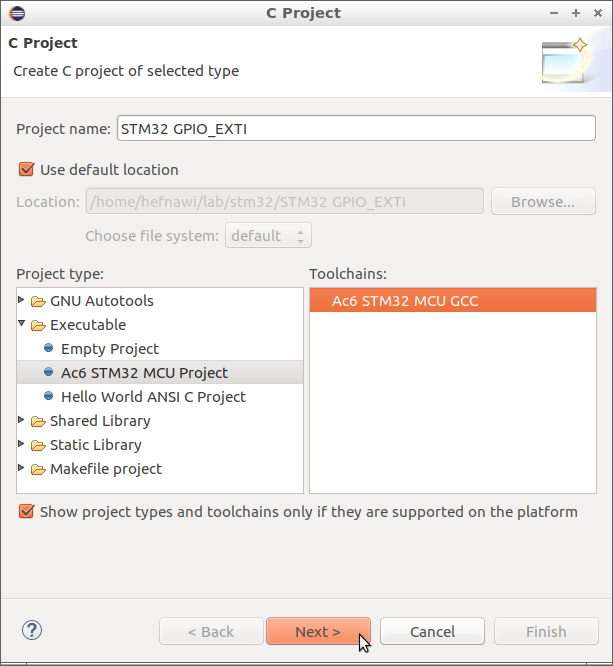
Fill out the Project name text field with your preferred value.
For Project type choose Executable -> Ac6 STM32 MCU Project.
For Toolchains there should be a single option: Ac6 STM32 MCU GCC.
Now, click Next > to proceed.
For the next window it would be Configurations, I’m using the defaults, so just hit Next > if you are following along.
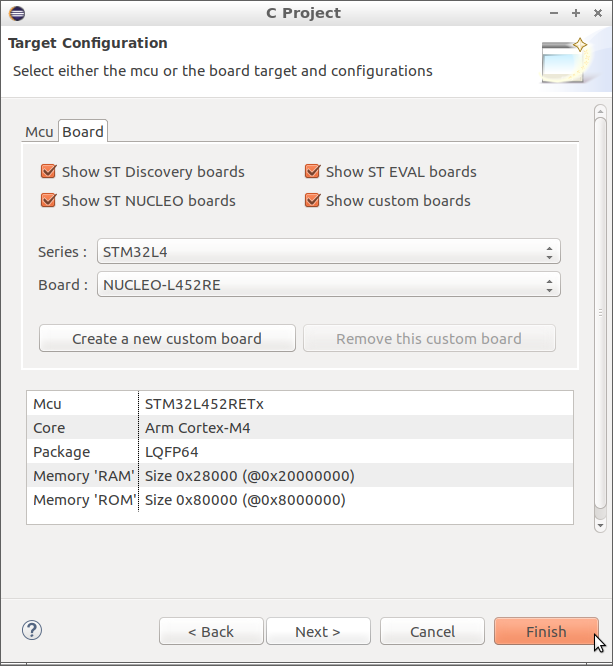
Now, the Target Configuration window, start by the Board tab and select the correct board, for me, it’s the NUCLEO-L452RE,
So I’m choosing Series as STM32L4 and Board as NUCLEO-L452RE.
You should end up with a window setup like this screenshot below,
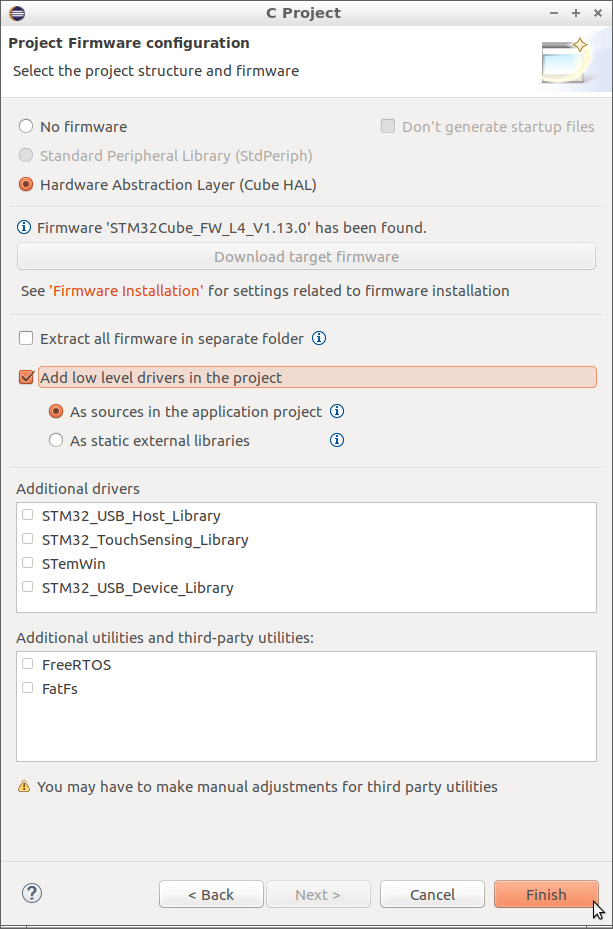
Click Next >, and you should see the Project Firmware Configuration window.
I will choose the Hardware Abstraction Layer (Cube HAL), if the firmware is available in your machine you should click on Download target firmware button and wait for it to finish. In my case, I downloaded the firmware: STM32Cube_FW_L4_V1.13.0.
Finally, click Finish and we are done creating and configuring the C project.
Method B: Import Existing project (Recommended)
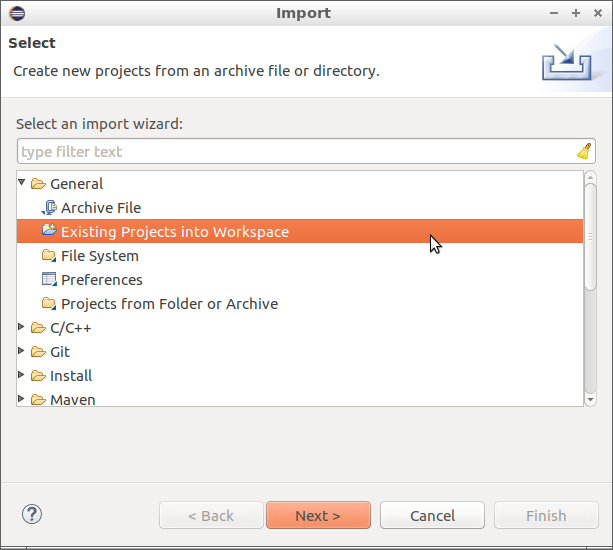
From File choose Import, and you should get the Import window, now, select this import wizard option General > Existing Projects into Workspace, then click Next >.
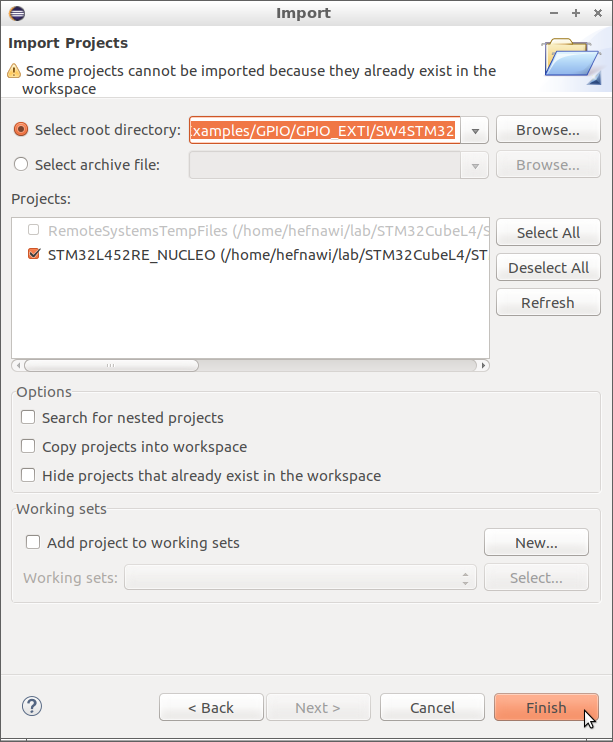
Now click on Browse... next to the select root directory: label.
You should now browse to the location where you downloaded the STM32CubeL4 git repository, and choose the SW4STM32 directory under GPIO_EXTI project; I have mine in the following location,
| |
Now, hit Finish
Project Explorer
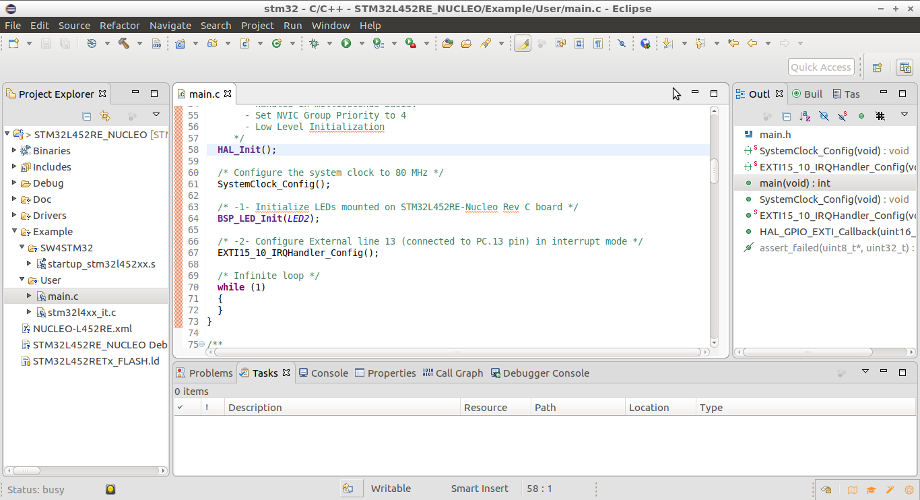
If you follow up using Method B, you should end up with something similar to the following in the Project Explorer,
Build Project
Select the Project in the Project Explorer tab; Click on Project in menu bar > Build All.
Another method is to simply hit the hammer icon in the toolbar or Ctrl+B.
Program Chip
Just follow the following steps to program the STM32 MCU and you are done 😉
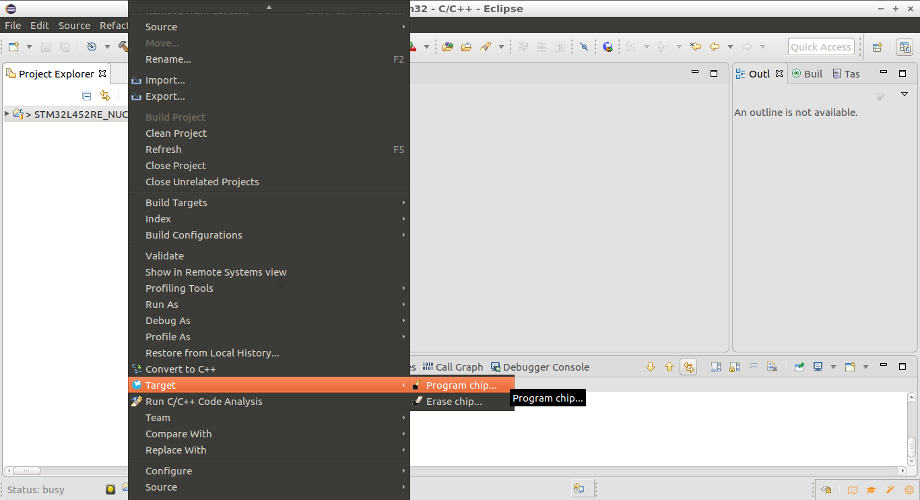
Right-Click on Project in the Project Explorer tab;
From the menu, select Target menu > click on Program Chip... option
Test Program
Now you should be able to toggle the LD2 LED every time you push the blue USER push-button 😄
Enjoy this little video in my tweet:
Day 21
— Ahmed H • MMØTTZ (@hefnawi_) February 22, 2020
After so much failing trials I finally got my first program to build and run for STM32L452 using a NUCLEO-L452RE dev board. See the outcome in the video attached
🎉
Feels great sharing my victory moment with you all!#STM32 #100DaysOfCode #SW4STM32 #STM32CubeL4 #hardware pic.twitter.com/qmcBQ4XyC2
References
STM32CubeL4 MCU Package User Manual
RIP Tutorial: Getting Started with stm32
Please feel free to ask about any missing details or suggest modifications or comment 😄
